Any tips on Illustrator's Mesh Tool?

M

MacHeadCase

Guest
A friend of mine asked me to do a drawing for the Taoist Tai Chi club. The drawing is supposed to go on next year's t-shirt for the year of the rat.

I am trying to give some 3D feel to the rat's paws. I tried using the Mesh Tool but it keeps wanting to either put the mesh top to bottom or it makes a link with the wrong side (i.e. I am trying to mesh the toes separately, but it doesn't go the way I want it — it keeps wanting to put the mesh on the side of the paw instead of the other side of the toe...)

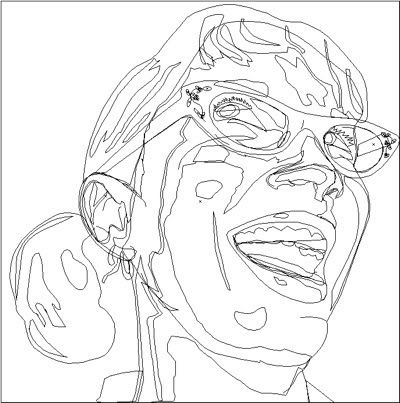
See attachments that illustrate what I am trying to do...

Anyway the way the mesh wraps itself around the shape doesn't make for a nice 3D feel.

Would anyone happen to have tips so I can do a decent mesh? What I do to give it colour is click with the direct selection tool then with the eyedropper I tag a colour to each point. Maybe that's the wrong way of doing things?

Mesh.png

Mesh_result.png
 
Joined
Feb 2, 2004
Messages
12,455
Reaction score
604
Points
113
Location
PA
Your Mac's Specs
MacBook
Once you apply the mesh, you can use the control handles on it to shape it more to your liking. That way to can make it bigger, wider, smaller, etc. Plus, if you weren't aware already, you can choose what color you want the mesh to be. That way it is more subtle and still gives a good effect.

BTW, take a look at this guy can do using the mesh tool:

Masters of Adobe Illustrator: Yukio Miyamoto | Adobe Illustrator "Gradient Mesh"
 
OP
M

MacHeadCase

Guest
OMG.

That guy is so awesome! Wow! Do I ever need to practice this tool.

Thanks so much, DB! Am bookmarking that webpage. There's even tutorials, man this going to be a great reference tool!

Dang it! Can't give rep to you yet. Gotta spread it around, it says.
 
Joined
Feb 2, 2004
Messages
12,455
Reaction score
604
Points
113
Location
PA
Your Mac's Specs
MacBook
Another thing you can do is to make up the foot with pieces. What I mean by that is to not make it one shape, but use many shapes to build up the final piece. That way, you can apply a mesh to a smaller area and give it a more pronounced feel.
I used that principle here:
wires.jpg
preview.jpg
 
OP
M

MacHeadCase

Guest
Ohh that's a cool idea!

We haven't seen the Gradient Mesh as of yet at school and I guess I am trying to jump the gun here. And I see what you mean by allocating a colour before applying the mesh to an object. I am looking at this great tutorial from the link you gave us previously, DB. I see from that lesson that they apply the gradient, then they work it in the shape.
 
Joined
Aug 15, 2006
Messages
483
Reaction score
13
Points
18
Location
Abu Dhabi, United Arab Emirates
I don't understand Yukio Miyamoto's work? Has he actually done that motorbike one line by line? Or managed to change it from that image to that linear drawing? If the latter how do you do this in Illustrator?
 
OP
M

MacHeadCase

Guest
The bio says he has went through all the versions of Illustrator since the beginning so he kinda "grew up" with it. My guess is the software holds no secret for this guy and he knows exactly how the app will react and how it works. That's why he can use it the way he does. It's awesome work.
 
Joined
Feb 2, 2004
Messages
12,455
Reaction score
604
Points
113
Location
PA
Your Mac's Specs
MacBook
I don't understand Yukio Miyamoto's work? Has he actually done that motorbike one line by line? Or managed to change it from that image to that linear drawing? If the latter how do you do this in Illustrator?
He works on a similar principle as I do. If you look at my post, the first image is what I drew using the pen tool in Illustrator. Then, you apply colors to the different paths and shapes. Then you end up with what I have in the second image with all of those paths and shapes filled with color.
It is just like a coloring book, you draw the lines first and then color them in.
:black:
 
Joined
Sep 9, 2006
Messages
690
Reaction score
51
Points
28
Your Mac's Specs
macbook
The gradient mesh is an absolute pain to use. One tip I'd strongly recommend, which I used a lot when I HAD to use it, was to first duplicate the shape before applying the mesh. I don't know if it's possible to scrap a mesh once it's applied, so if you've spent time creating the shape, it's a good idea to duplicate it should things go bad with the mesh (and they most likely will, at first)

A few other things to consider with meshes - fewer segments means smoother gradients, more segments will give sharper lines. I'll set up some new swatches in my palette, and then drag them onto the segments I want coloured. This should help with consistency of colours.

Depending on the level of detail you want, a gradient mesh may not be necessary. Alternatively, you could go for a style similar to DB's work, with solid shapes mixed with gradients. You may want to keep the vector look, and create highlights through shapes as DB did, through altering colours and transparency. Just consider the size the toes will print out at, and if it's worth going through the headaches of meshes to create something slightly more photorealistic.

Man, I really need to get back to doing some vector work...
 
OP
M

MacHeadCase

Guest
Thanks for your input, dtownley.

I really can't get the mesh to follow the shape I want it to colour to give it a 3D feel. Might have to change strategy here.

When I try to apply the rows and columns the points attach themselves in a crazy manner and, other than playing with the direct selection tool to try to minimize the slack in the mesh (and even then, the mesh is so loose, I can't make it tight enough), there isn't much I can do. I can't drag and replace the points that attach themselves on the side of the shape.

So will rethink my strategy to give the shape a better look. DB's suggestion is sounding pretty good at the moment.
 

Shop Amazon


Shop for your Apple, Mac, iPhone and other computer products on Amazon.
We are a participant in the Amazon Services LLC Associates Program, an affiliate program designed to provide a means for us to earn fees by linking to Amazon and affiliated sites.
Top