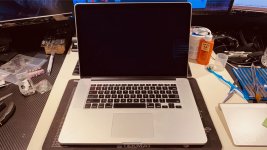
My Covid MacBook Retina Project

OP
iggibar
Joined
Apr 20, 2009
Messages
4,301
Reaction score
124
Points
63
Location
The lonely planet
Your Mac's Specs
Too many...
I have a decent-sized update.

So, this morning, I was contacted by the seller of the 2.2 MBP, and he had an exact MBP that he would swap with me. He made sure everything worked before asking me. I agreed to the swap. He emailed me a return label....

However, at about 8:30 PM, while getting ready to box up the 2.2, I gave it one good stare and said the heck with it!

I threw my anti-static mat on the desk, and went to work on the 2.2.
I use a program called Open Board View. It allows you to view motherboards of various electronic devices.
I downloaded a .brd file of the 820-3662-A logicboard, and started tracing everything from the LCD connector back to the fuse. I already knew the fuse was bad, but I needed to make sure everything else checking out fine when testing for resistance and voltage rating.

These are screen shots from the boardview diagram I used to help out tracing everything.
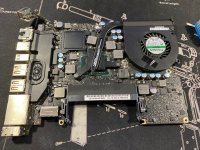
This is the complete logicboard of my 2.2 mid 2014 MBP:
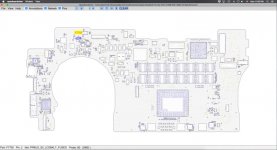
Screen Shot 2020-05-04 at 11.00.05 PM.jpg
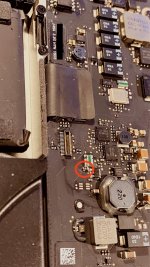
Below is the LCD fuse. The green circle is ground.
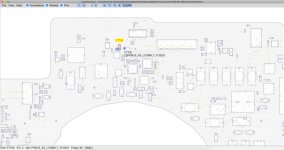
Screen Shot 2020-05-04 at 11.00.30 PM.jpg
This is the LCD connection. #1 pin is what I started with since it's the common one to cause problems.
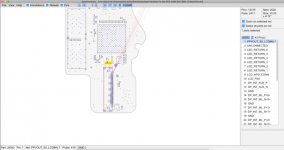
Screen Shot 2020-05-04 at 11.02.24 PM.jpg

I traced and followed EVERY POSSIBLE path back to the fuse, and found ZERO issues that would cause the fuse to pop. I believe what happened here is the person who removed the screen did so while the battery/power was connected, and caused the TINY pins to touch and blow the fuse. Normally, this also melts the pins, but there's no other reason for the fuse to not work.

So, I proceeded with taking out the fuse from the 13" retina donor board. WHAT IN THE WORLD!! The fuse end melted and came right off. Not what I wanted to happen!:angry

Soooo what to do, what to dooooo???

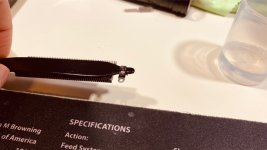
How about take apart a Microsoft keyboard dongle?
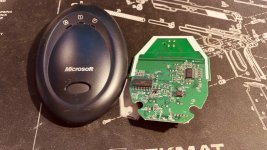
IMG_3777.jpg
I found a fuse on it that works and took it off.

Then I went to the 2.2 MBP fuse to take it off.
For people that aren't familiar with Apple solder, they use a "special" mix that contains lead free solder. This makes it harder than normal to remove them because you normally need to use a higher temperature. This is good for reliability, but horrible for repair work.

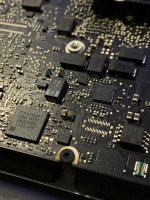
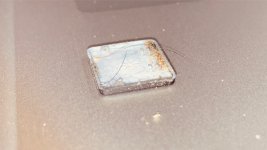
This is the original fuse. It's hard to tell, but the copper ground connection is melted down to the board.
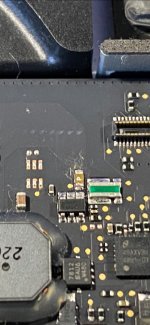
IMG_3775.jpg

I couldn't take photos of this process because it was a little too complex for one person to do it while taking photos.
I ripped a usb wire apart. Took a single strand of copper wire out and made a small ball. I mashed it into the hole where the normal ground terminal connection would be for the fuse, and squeezed some more flux onto it. I soldered some 60/40 mix to make a strong base for the new fuse to attach to.
It didn't look as good as it does before the hole was burned through, but it's the best I can do!

Pics to follow.....
 
OP
iggibar
Joined
Apr 20, 2009
Messages
4,301
Reaction score
124
Points
63
Location
The lonely planet
Your Mac's Specs
Too many...
I'm horrible at taking these pics.
You can see how the raised ground base no longer lets the fuse sit level.

IMG_3776.jpg

But guess what?
IMG_3771.jpg
SUCCESS!!!!!

Now I was in a predicament. Having fixed the MBP, I felt bad about the seller. I sent him an email, along with photos of the fix. He was thankful and appreciated the effort to troubleshoot and try to fix it. I offered to cover the cost for his new shipping label that he paid $19 for. But he declined.

Folks, I guess this is all part of the project! This is stuff that anyone could experience when buying used parts.

 
Last edited:
OP
iggibar
Joined
Apr 20, 2009
Messages
4,301
Reaction score
124
Points
63
Location
The lonely planet
Your Mac's Specs
Too many...
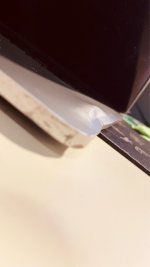
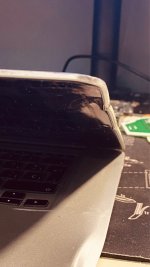
And on top of this, my other damaged retina MBP came in today.

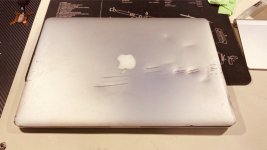
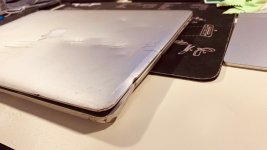
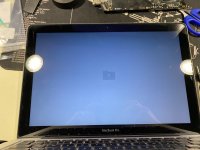
It really IS damaged.

IMG_3761.jpg
IMG_3762.jpg
IMG_3764.jpg
IMG_3766.jpg
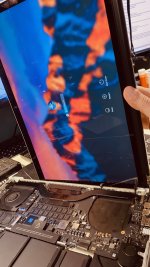
But it works just fine when tested with the other screens.
IMG_3767.jpg

I'm really trying to figure out how this really got damaged, but I got nothing.

As far as the #2 build goes, I have everything except for the replacement topcase. Tracking info says a shipping label was created on May 1st, but USPS has not received it yet. :Not-Amused:
 

pigoo3

Well-known member
Staff member
Admin
Joined
May 20, 2008
Messages
44,213
Reaction score
1,424
Points
113
Location
U.S.
Your Mac's Specs
2017 15" MBP, 16gig ram, 1TB SSD, OS 10.15
Congrats Iggibar...on getting things working with that fuse replacement!:)

It's also especially rewarding that the fuse replacement got things operational...which confirmed that all your troubleshooting was correct (it was the fuse that was bad). I've been in situations where I troubleshooted things as best as I could...moved forward with the repair...and it didn't solve the issue. Either because it wasn't the "true issue"...or maybe there were multiple issues.

Also very very nice of the eBay seller to not require you to reimburse them the $19 for the shipping label!:)

Great job Iggibar...that's some terrific troubleshooting & repair work!

- Nick
 
Joined
Nov 1, 2007
Messages
1,251
Reaction score
80
Points
48
Location
Swansea - South Wales
Your Mac's Specs
21 M1 Pro 14" MBP, 23 M2 Pro Mac Mini (MacOS 14), iPhone 15 Pro Max (iOS 17), iPad 6 (iPadOS 17)
Excellent project - I love looking at stuff like this and particularly enjoy this chap's YT channel:

YouTube

I've embarked on a restoration project of my own during my "shielding" here in the UK. It's been something I've had on my to do list for 3 years or so. It's the rebuilding of a 1980's Peugeot Professional racing bike! So, much easier than your project I know, but the trawling of ebay for period parts mirrors your search I guess!

Anyway, good luck :)
 

IWT


Joined
Jan 23, 2009
Messages
10,292
Reaction score
2,231
Points
113
Location
Born Scotland. Worked all over UK. Live in Wales
Your Mac's Specs
M2 Max Studio Extra, 32GB memory, 4TB, Sonoma 14.4.1 Apple 5K Retina Studio Monitor
@iggibar,

Firstly, I think your project and accompanying photos are really quite wonderful. Thank you for sharing these with us.

Secondly, I never cease to be amazed by the extraordinary damage some people inflict on their expensive devices. The mind boggles.

Ian
 
OP
iggibar
Joined
Apr 20, 2009
Messages
4,301
Reaction score
124
Points
63
Location
The lonely planet
Your Mac's Specs
Too many...
Thanks everybody

Yeah, projects can be fun. I’ve noticed they can be especially rewarding if you try something new, fix something that was broken, and bring life back to old cars and motorcycles for example. It’s one of the reasons why I knew right off the bat I was probably going to spend more money for all these parts than it would be cost to buy one working MBP. But the experience more than makes up for extra cost.

One of my best friends has a 2010 13” MacBook Pro that suddenly stopped working after a “small” glass of water tipped over on the trackpad area. I’m going to be looking at that as well sometime later today when he drops it off.

Life is interesting when you have almost no obligations like work


Sent from my iPhone using Mac-Forums
 

pigoo3

Well-known member
Staff member
Admin
Joined
May 20, 2008
Messages
44,213
Reaction score
1,424
Points
113
Location
U.S.
Your Mac's Specs
2017 15" MBP, 16gig ram, 1TB SSD, OS 10.15
That latest MacBook Pro you received looks like someone was playing "fetch" with thier pet Saint Bernard! Lol
 
OP
iggibar
Joined
Apr 20, 2009
Messages
4,301
Reaction score
124
Points
63
Location
The lonely planet
Your Mac's Specs
Too many...
That latest MacBook Pro you received looks like someone was playing "fetch" with thier pet Saint Bernard! Lol

hahahaaaa I agree!

I’ve been getting really tired lately. Like I just ran a marathon. My friend dropped off his 13” MBP, and I needed up fixing it. Took some pics of the quick process, but was just suuuuuper tired and didn’t have energy to fix the pics so they could be attached here. I’ll try to sort through everything at some point today and have some new pics. My topcase is also suppose to be delivered today


Sent from my iPhone using Mac-Forums
 

Slydude

Well-known member
Staff member
Moderator
Joined
Nov 15, 2009
Messages
17,616
Reaction score
1,079
Points
113
Location
North Louisiana, USA
Your Mac's Specs
M1 MacMini 16 GB - Ventura, iPhone 14 Pro Max, 2015 iMac 16 GB Monterey
I was thinking it might be something a little larger than your typical Saint Bernard.
 
OP
iggibar
Joined
Apr 20, 2009
Messages
4,301
Reaction score
124
Points
63
Location
The lonely planet
Your Mac's Specs
Too many...
So this little in-between project monster that came to me needing help. I couldn't turn it away.
This is my best friends 13 MBP Core i5 2.4GHz. It was no longer functioning after a small spill near the trackpad area. Plugging it in caused the magsafe led to always turn green. Pressing the battery stat button made it blink 5 times. Turning it on did absolutely jack squat. He hasn't been using it, but he thought it was taking up space for nothing and wants to sell it.

So I ripped it apart!

As I usually do, I took a peak underneath. Right off the bat, I found some little corrosion, and a capacitor that didn't look right.
I took the logicboard out so I could have a look on the topside. Top side looked good.
61024867656__B4BF9BAA-EB66-44D8-9C97-79FD02F5FDA7.jpg
61024740727__23C67A1F-F12A-4D15-8104-02AB8D12AC6C.jpg
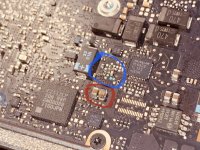
Area marked in blue is what I believed to be the heaviest area of water damage, but the water marked area was much larger.
Area marked in red are the two capacitors that don't look right.
IMG_3738.jpg

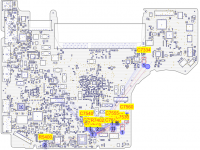
I downloaded a boardview schematic of the logicboard to see the pathway for these two caps. Turns out it's connected to 43 components, with most of them being related to controlling CPU and power. I plugged the magsafe and checked voltage. Volts didn't match.
Screen Shot 2020-05-06 at 8.13.58 PM.png

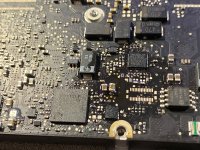
Replacing the cap was the first step to take. The right side cap showed no power flow, so it's the one I replaced.
61025284397__9B8F8F28-CEB9-4E62-ABD4-F72C7C22AF82.jpg
 
Last edited:
OP
iggibar
Joined
Apr 20, 2009
Messages
4,301
Reaction score
124
Points
63
Location
The lonely planet
Your Mac's Specs
Too many...
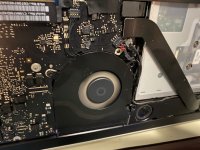
And then I plugged the power back in. Being that it didn't have any ram or an HDD installed, hearing the fan spin and missing ram chime got me all excited :D

61025272897__81702C5B-E4AD-4B31-A5BE-3CC1711BC0A7.jpg

I temporarily connected the screen to test, and it worked. I double checked all the necessary voltage readings, and everything was perfect. I also tested with an old MBP HDD I had, and it booted up and ran fine.

61025274102__C33B65ED-3982-4EC2-A5FE-513CF778D07B.jpg
After all that, I installed the logicboard back in and closed it up.
Another Macbook saved :)
 
OP
iggibar
Joined
Apr 20, 2009
Messages
4,301
Reaction score
124
Points
63
Location
The lonely planet
Your Mac's Specs
Too many...
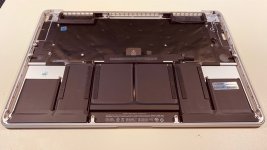
The topcase for the 2nd retina MBP came in today. The condition is as expected. Some scratches as expected from the photos.
Going to start taking apart the original MBP topcase and transplanting parts soon.
IMG_3839.jpg
IMG_3841.jpg
IMG_3838.jpg

I also got in touch with the seller for one of the screens about its condition. I was able to get a $50 refund, which goes towards the 2nd MBP build.

Pretty happy so far the way things have been working out. More to follow.
 
Joined
Apr 17, 2009
Messages
13
Reaction score
4
Points
3
Just want to wish you well on your recovery. Pray you will get over this without developing more symptoms. You are so wise to invest your time in a project you love.
 
OP
iggibar
Joined
Apr 20, 2009
Messages
4,301
Reaction score
124
Points
63
Location
The lonely planet
Your Mac's Specs
Too many...
Just want to wish you well on your recovery. Pray you will get over this without developing more symptoms. You are so wise to invest your time in a project you love.

Thank you! I haven’t really been feeling that great to work on anything these last 2 days. My sleep schedule is all messed up. I don’t think I’ve gotten more than 1.5 hours of solid sleep in the past 2 days. I’m hoping maybe later today I’ll get a chance to post an update.


Sent from my iPhone using Mac-Forums
 
OP
iggibar
Joined
Apr 20, 2009
Messages
4,301
Reaction score
124
Points
63
Location
The lonely planet
Your Mac's Specs
Too many...
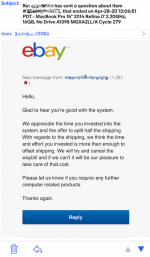
Screen Shot 2020-05-08 at 5.20.16 PM.png
This was the recent communication from the eBay seller of my 2.2 MBP. I offered to cover half the cost this time, but he refused again. lol

In regards to the screen refund, I had not noticed a small peck on the lower left side of the screen that looks like a tiny needle poked it. This can be seen in the previous photo I posted where I tested the screens. The speck is just a pressure point issue where the glass pushes on the LCD and distorts the pixels in the area. Not really a concern, and don't care that much about it, but I still let the seller know about it because it was also on his photo after matching it up. He offered a partial refund, or swap. I took the refund.

IMG_3829.jpg

I cleaned the replacement topcase, but I noticed it was actually in pretty good condition inside. That's the complete OPPOSITE of my chewed-up topcase!

Side rant- I need to proclaim my appreciation for IFIXIT's Apple repair tool kit. I've bought many similar kits, and they've all stripped or worn out. Not with this kit! You will NOT regret it! Probably the best tool kit I've ever purchased! I love it!

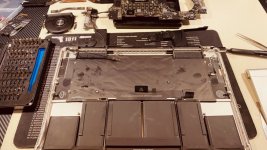
Back to reality- Having removed all components from the chewed topcase, I started cleaning them. Used only alcohol on everything.
IMG_3843.jpg

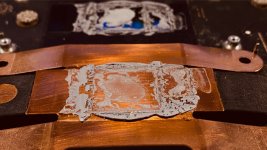
When I removed the heat sink and cleaned the old and dried out paste.
IMG_3842.jpg
I noticed the right side arm that secures the coper tube to the chassis was no longer attached to the fins. This means the right side heatsink fins are not secured, and could possibly damage the CPU if there's movement. To fix this issue, I bent the two fin arms of the damaged end, and turned them around so that they clamp around the copper tube, and still allowed me to use the original screw mount location.

IMG_3852.jpg
 
OP
iggibar
Joined
Apr 20, 2009
Messages
4,301
Reaction score
124
Points
63
Location
The lonely planet
Your Mac's Specs
Too many...
While I was moving the replacement topcase, I noticed the R key had popped out. Not sure if this is how it came, but the top tabs of the key that snap into the scissor key assembly were both snapped. I had to replace it with a key from the old keyboard. Prepare yourself for the HORROR!!

Look at how FILTHY this keyboard was from the "old" topcase!
IMG_3847.jpg
IMG_3844.jpg
So glad it's being replaced!
The "new" topcase is comparably in muchhh better condition!
IMG_3850.jpg
This was my first time repairing keys on the newer MBP. While I was doing this, I wanted to do something I always wanted...make the keys glow blue when the backlight is on. It was a pretty simple task, just needed repeating 26 times. I took each key out, and colored the back with blue permanent marker. Pics of this will be posted later.

Now, I focused my attention back onto the guts of the system.
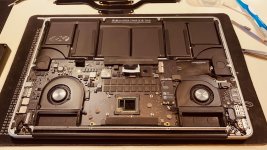
IMG_3853.jpg
I have to say, working on something yourself gives you a sense of comfort knowing exactly what went into fixing or cleaning your system. Knowing how clean this is really makes me happy.

I finished with installing the fixed heatsink, and closed everything up.
 
OP
iggibar
Joined
Apr 20, 2009
Messages
4,301
Reaction score
124
Points
63
Location
The lonely planet
Your Mac's Specs
Too many...
This is my 2.0GHz retina after rebuilding it:
IMG_3862.jpg
IMG_3863.jpg
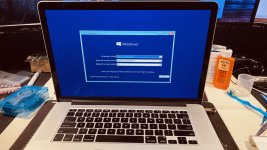
And I found a little hidden window when opening the command screen to boot from the USB installed:rofl
IMG_3864.jpg
It's on Catalina and running buttery smooth! Super happy with it:app:laugh
 

pigoo3

Well-known member
Staff member
Admin
Joined
May 20, 2008
Messages
44,213
Reaction score
1,424
Points
113
Location
U.S.
Your Mac's Specs
2017 15" MBP, 16gig ram, 1TB SSD, OS 10.15
And then I plugged the power back in. Being that it didn't have any ram or an HDD installed, hearing the fan spin and missing ram chime got me all excited :D

I temporarily connected the screen to test, and it worked. I double checked all the necessary voltage readings, and everything was perfect. I also tested with an old MBP HDD I had, and it booted up and ran fine.

After all that, I installed the logicboard back in and closed it up.
Another Macbook saved :)

Congrats Iggibar...you da man! Very impressive repair work!:)

- Nick
 

pigoo3

Well-known member
Staff member
Admin
Joined
May 20, 2008
Messages
44,213
Reaction score
1,424
Points
113
Location
U.S.
Your Mac's Specs
2017 15" MBP, 16gig ram, 1TB SSD, OS 10.15
I need to proclaim my appreciation for IFIXIT's Apple repair tool kit. I've bought many similar kits, and they've all stripped or worn out. Not with this kit! You will NOT regret it! Probably the best tool kit I've ever purchased! I love it!

Can you post a link to the specific Apple Repair Toolkit you're happy with please? In case other folks would like to check it out & maybe purchase.

Thanks,:)

- Nick
 

Shop Amazon


Shop for your Apple, Mac, iPhone and other computer products on Amazon.
We are a participant in the Amazon Services LLC Associates Program, an affiliate program designed to provide a means for us to earn fees by linking to Amazon and affiliated sites.
Top