- Joined
- Mar 30, 2005
- Messages
- 9,571
- Reaction score
- 25
- Points
- 48

Downloading Big Sur beta from the Apple Developer website

Once the dust has settled from the excitement of the annual Apple Worldwide Developer Conference (WWDC), it’s always time to start loading beta operating systems just to see how current apps work with them. If you only have one Mac and can’t “sacrifice” one to running beta software, it’s useful to install the operating system on an external drive, then boot from it when you wish to test the beta. That’s what I attempted…until it didn’t work.
At the time of publication, only Apple’s Developer program members can download and install the beta. If you’re not a member but would like to be, check out the Developer website, and you can get all of the benefits of being a developer for only $99 per year.
Sometime later in July, we expect Apple to open and free beta testing to anyone who would like to try out the new features of macOS Big Sur. If you’re not a member of the Apple Beta Software Program, use this link to join up.
In both cases, once the beta OS is available, you’ll need to log in to your account (developer or public beta) and install a profile on your Mac. This profile registers your Mac as a beta device and the installer becomes available in System Preferences > Software Update.
Apple seems to have had an issue deciding if Big Sur was going to be macOS 10.16 or macOS 11 — we’ve seen definitive proof that it is the latter, but the first beta still shows 10.16…

Big Sur Beta – where 11 is 10.16…
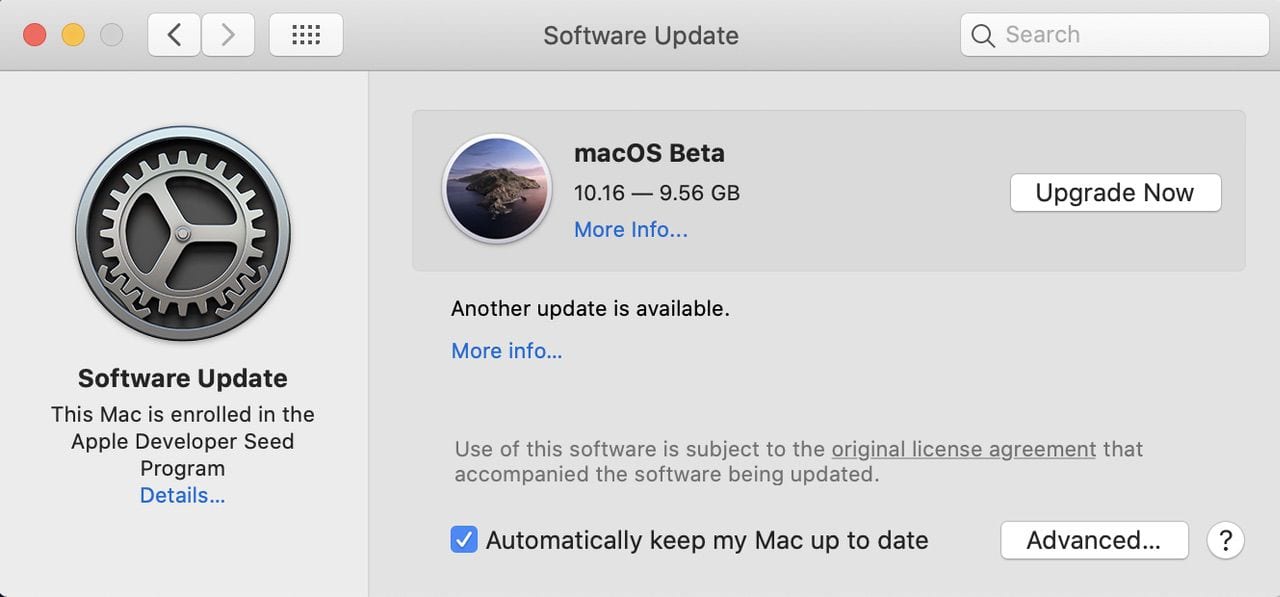
One thing I did to avoid accidentally updating my primary boot drive to the new macOS version (and also to avoid having other macOS betas installed) was to uncheck the “Automatically keep my Mac up to date” box seen in the image below.
With a click on Upgrade Now, the Install macOS Beta app was downloaded to my Mac. Once the download was completed — it took about 19 minutes on my network — the installer launched.
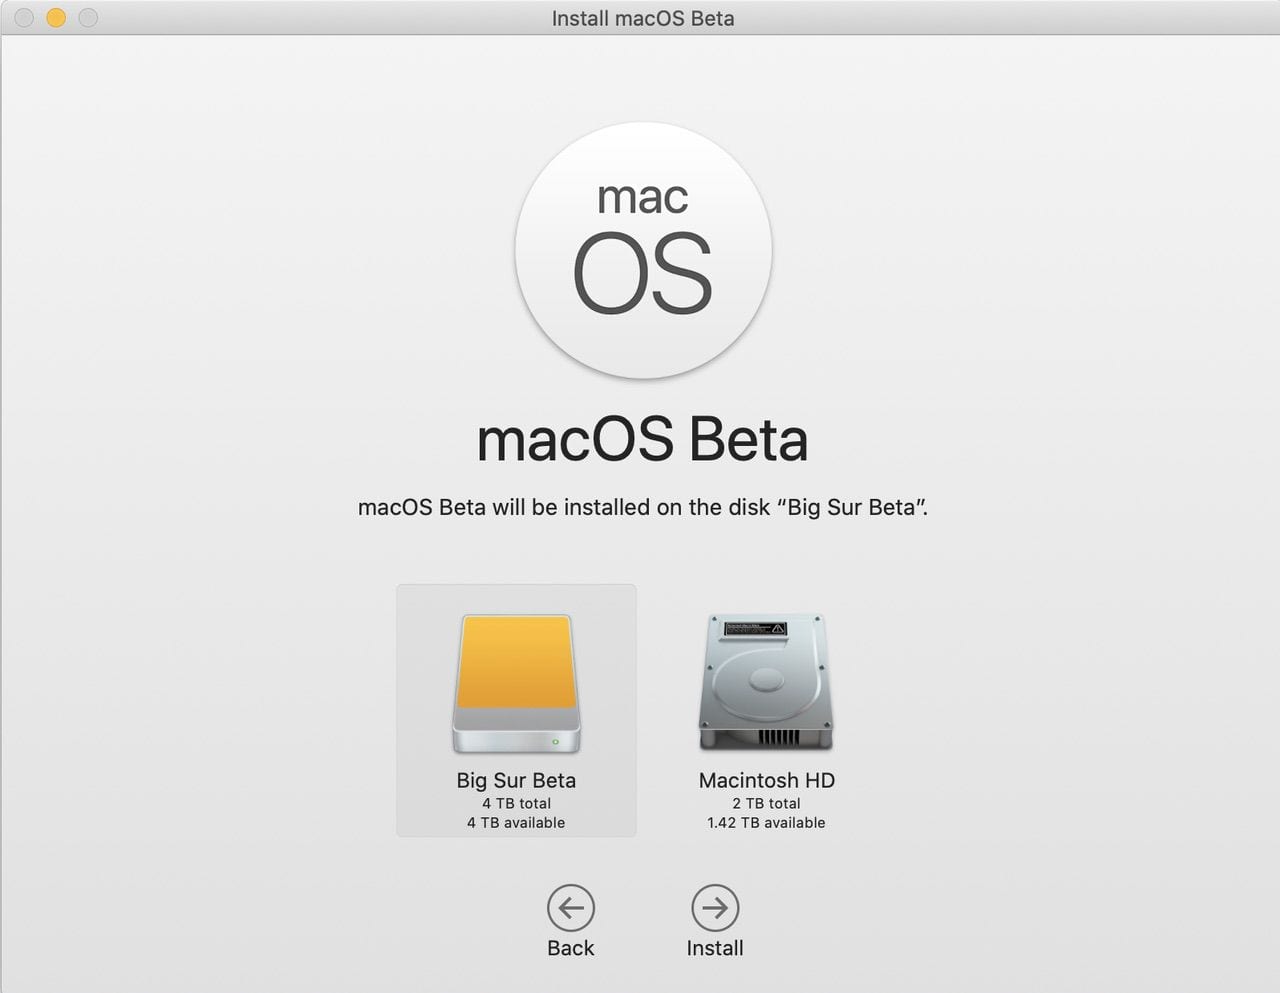
Before I tried installing macOS 11 Big Sur onto my external drive, I made sure that it was prepared for the beta. I took a 4GB external USB drive, erased it in Disk Utility, gave it a new name — Big Sur Beta — and made sure it was formatted as APFS so the installer would recognize it. Once this was done, I re-launched “Install macOS Beta”, agreed to the license agreement, and then clicked “Show All Disks” in order to see the external drive I wanted to install onto.

Starting the installation attempt…
Once I had highlighted Big Sur Beta, I clicked the Install button and let the installer go to work…and that’s when things started to go badly. The installation would run for about ten minutes, and then the MBP fan would go to full power before the machine rebooted and stalled at the Apple logo. I tried rebooting several times, making sure to have the MBP go to the external drive to restart the installation, but nothing worked. The attempts went on for about four hours…
At that point, I decided to do something different since it was apparent that for some reason, the beta wasn’t going to install on the external drive. I don’t know what the reason for the installation failure was. I had gone into Recovery Mode and set startup security so that the MacBook Pro could boot from an external drive, but it just wouldn’t work. I’m still checking the developer forums to see if others have had the same issue.
There is a long list of initial bugs – after all, this IS beta software – but none of the issues listed seemed to be similar to what I experienced.
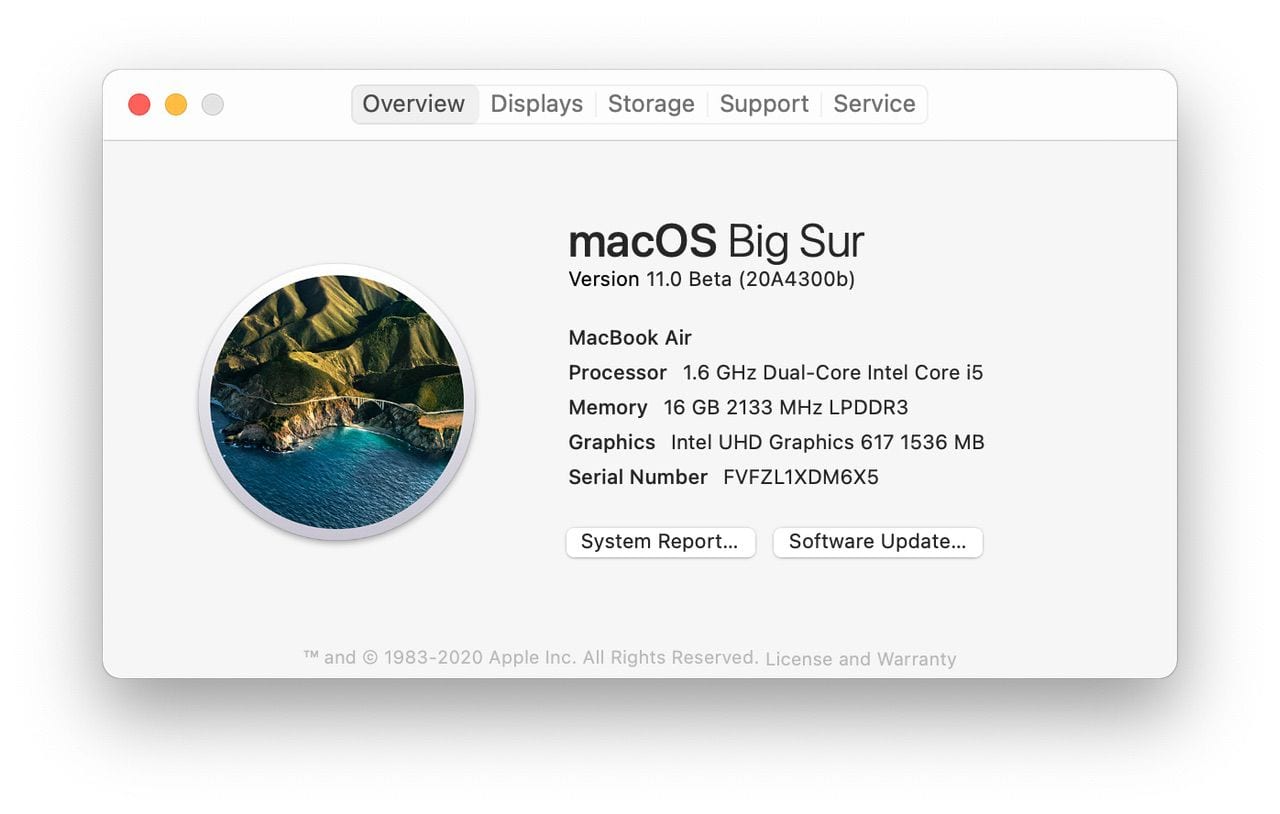
My solution? Sacrifice a 2019 MacBook Air to the beta software gods, since I really didn’t want to affect my primary work machine and I did want to get this article to all readers of The Rocket Yard as soon as possible. All the steps up to this point were identical, except I chose to install Big Sur onto the internal SSD instead. By this point, Big Sur beta 2 had become available, so that’s what’s running on the MacBook Air. I did not try to do the installation on the external drive again.
This installation went smoothly, but slowly, taking 1 hour and six minutes and a LOT of reboots. Since Big Sur brings back the lovely Mac startup chime, that meant I got to hear it repeatedly. Like most upgrade and update installations, the process is fairly boring – generally, you see just the white Apple logo and a progress bar. At one point, I was surprised to see the progress bar turn green and the Apple logo blue, but sadly that only lasted for about a second. Finally, success:

Success! And it’s now macOS 11
The first thing you noticed about Big Sur is just how colorful it is with its bright backdrop and opaque menubar and Dock. The menubar honestly seems to disappear, with the menu items seeming to float in midair. The Dock icons are more rounded than before and have a 3D feel to them – especially those for Mail, FaceTime, Messages, and System Preferences.
There are also new sounds associated with common actions – moving a file, taking a screenshot, etc… For those of us who have been using various versions of Mac OS X / macOS for the past 19 years, it’s odd to hear new sounds associated with familiar actions.
Being curious, I decided to launch many of the standard iCloud-synced apps (Mail, Calendar, FaceTime) only to have them lock up and display the dreaded “Application is Not Responding” error message. This is the “joy” of beta testing; my guess is that I needed to wait for all of these apps to synchronize with iCloud before opening them.

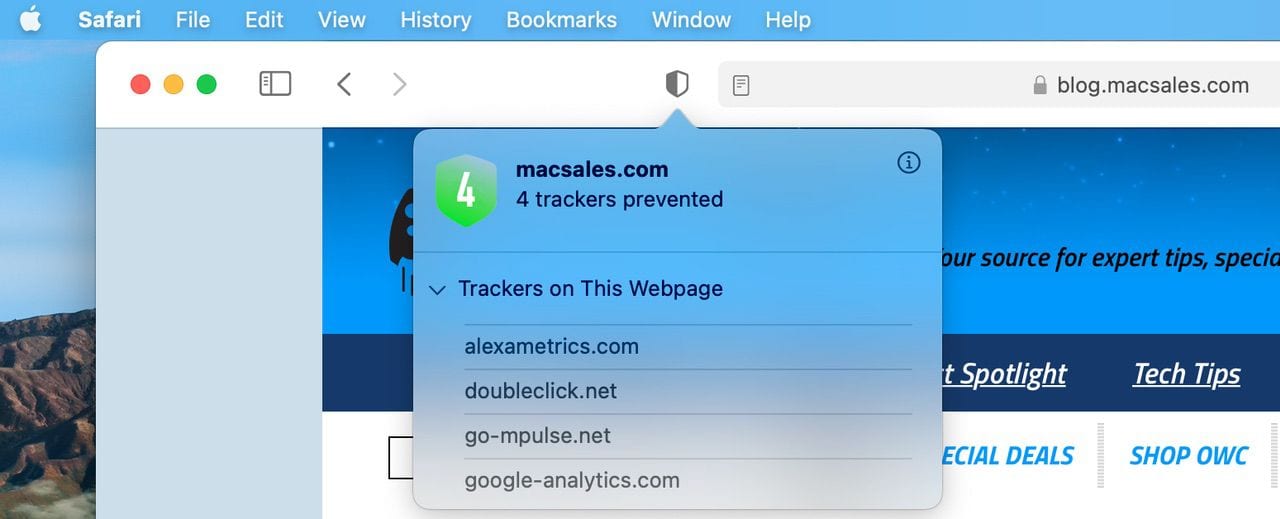
The new Safari privacy report and opaque dialog window
Safari worked beautifully the first time I launched it, with The Rocket Yard being the first site I visited. You can see the new privacy report in the screenshot above. The new customizable Start Page is attractive and it’s possible to get rid of those things you don’t want to see, as well as add a personal touch with a backdrop image.
Sure enough, after about an hour I found that most of the traditional apps were now loading properly, and after a night of syncing, everything was running smoothly.
If I were going to make one suggestion to anyone who is considering trying out Big Sur, it’s to just let the Mac sit for a few hours before you try out any of the apps. Let the iCloud synchronization and Spotlight indexing finish, and you’ll avoid some frustration.
I plan to write another post about my adventures with Big Sur soon, highlighting some of the differences – both good and not-so-good – in the ways that the new operating system and Mac apps get along.
Click here to view the article...


