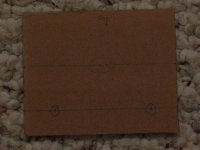
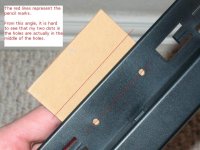
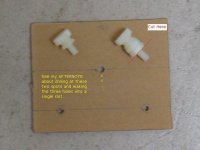
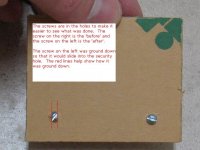
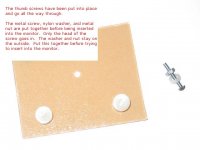
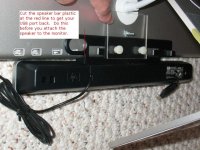
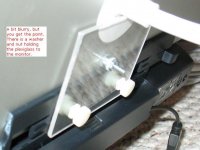
Here is a little project I did to add a nice speaker bar to my 20" ACD. Hopefully someone will find it useful for adding the speakers that Apple forgot. The idea is not original and I decided to do this after seeing something similar on a Dell monitor.
Aside from the thing working, I had just two requirements. First, it had to look good. Apple puts out some of the coolest looking hardware and I did not want to distract from it. Second, I did not want to void my ACD warranty or permanently modify the ACD. It turns out that I got lucky and found the parts necessary to meet both requirements. The only down-side is that the result does use the security hole and one USB port on the back of the monitor. If you can spare those two things, you are ready to give this a try.
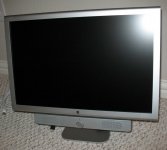
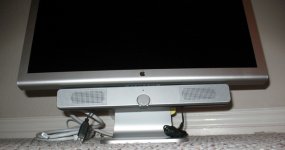
The speaker bar that I used was an HP product (the HP ee418aa). My requirements for the bar were that it not be battery powered and that it match the look of the ACD. The HP gets power from a USB port. This means that I don’t have to change batteries and I can use one of the USB ports on the back of the monitor. As for the looks, the HP is very plain looking, but it is silver. The added benefits of the HP were a headphone jack, manual volume control, and the cheap cost on ebay. On the down side, it is a bit tinny sounding and you will have to make a small modification to it so it does not block one of the USB ports on the back of the monitor.
Total cost of this fun little project was less than $20. With parts and tools in hand, it took about 10 minutes. If you want to do this to a 23” ACD, it should not be hard, you will just have to play with the measurements a bit.
Parts:
Comments on parts:
I chose nylon screws trying to reduce the amount that I would mark up my ACD. Also know that some of the white nylon parts are more yellow than white. Make sure you get white parts, unless you have an affinity for the yellowed ones or just don’t care. The only reason I got my plexiglass at Lowes and the screws/nuts/washers at home depot was because I had the plexiglass from a previous project (and my home depot does not sell it anymore). You could probably find all the parts at Lowes.
Cost:
$11 for the speaker bar
$5 for the plexiglass – with a lot left over
$4 for the screws, washers, and nuts
Tools:
Thanks,
LittleGuy
Aside from the thing working, I had just two requirements. First, it had to look good. Apple puts out some of the coolest looking hardware and I did not want to distract from it. Second, I did not want to void my ACD warranty or permanently modify the ACD. It turns out that I got lucky and found the parts necessary to meet both requirements. The only down-side is that the result does use the security hole and one USB port on the back of the monitor. If you can spare those two things, you are ready to give this a try.


The speaker bar that I used was an HP product (the HP ee418aa). My requirements for the bar were that it not be battery powered and that it match the look of the ACD. The HP gets power from a USB port. This means that I don’t have to change batteries and I can use one of the USB ports on the back of the monitor. As for the looks, the HP is very plain looking, but it is silver. The added benefits of the HP were a headphone jack, manual volume control, and the cheap cost on ebay. On the down side, it is a bit tinny sounding and you will have to make a small modification to it so it does not block one of the USB ports on the back of the monitor.
Total cost of this fun little project was less than $20. With parts and tools in hand, it took about 10 minutes. If you want to do this to a 23” ACD, it should not be hard, you will just have to play with the measurements a bit.
Parts:
- HP ee418aa Speaker Bar (I bought mine on ebay for $11 including shipping).
- 2” tall x 3” wide piece of plexiglass/acrylic/lexan
- You can make it as much as 3” tall. Do not make it any taller as the monitor power cable will get in the way. I would also recommend that you do not go wider than 3”.
- It needs to be 1/8” thick. This is a standard thickness, so it should not be hard to find. I found mine at Lowes – and they even cut it down for free. While you are there, have them cut you 2 or 3 pieces since there is no charge and you can always use a backup.
1 Metal Machine Round Head Screw
- #4-40 x 3/4” metal (Home Depot: 30699 27461)
- This item number form Home Depot contains 8 screws and nuts. It will contain the nuts in the next parts item.
- If you get something different, keep the size of the head no wider that 1/4" and the diameter of the actual shaft no wider than 1/8”. This screw needs to fit into the security hole on the back of the monitor, head first.
- 2 Metal Machine nuts
- #4-40
- These were in the same package as the Metal screws, above.
- 2 Nylon Washers
- #6 Nylon
- This washer will go on the Metal screw above. Unfortunately they did not sell a #4 washer, but the #6 works just fine.
- 2 Nylon Thumb Screws
- #8-32 x 3/4" Nylon (Home Depot: 30699 263783)
- 2 Nylon nuts
- #8-32 Nylon
- These are OPTIONAL, but well worth the 54 (or so) cents. You will put these on the nylon thumb screws to help properly cut the screws down to size and then discard these nuts.
I chose nylon screws trying to reduce the amount that I would mark up my ACD. Also know that some of the white nylon parts are more yellow than white. Make sure you get white parts, unless you have an affinity for the yellowed ones or just don’t care. The only reason I got my plexiglass at Lowes and the screws/nuts/washers at home depot was because I had the plexiglass from a previous project (and my home depot does not sell it anymore). You could probably find all the parts at Lowes.
Cost:
$11 for the speaker bar
$5 for the plexiglass – with a lot left over
$4 for the screws, washers, and nuts
Tools:
- Drill with 9/64” and 5/32” drill bits.
- Dremmel or similar grinding tool.
- Sharp Pencil
- Ruler with inches
- Hammer and nail (to pre-tap the drill points)
- small wrench to tighten the screws or a 1/4" ratchet bit. Not the ratchet itself, just the bit
- Utility knife or other tool to cut the screws down in size. I used a small, sharp pruning shears and it worked perfectly.
- Spare piece of wood for drilling – the hardware stores usually have free leftovers in the back of the store where they cut lumber for customers.
- Paper Clip – There is a little gray grommet inside the monitor security hole. If you push too hard with the screw, the grommet can start to go inside. If that happens, bend the paper-clip into a little “L”, put the tail of the “L” into the hole and twist and slowly pull it up. This should push it back into place.
Thanks,
LittleGuy


